
How Do You Install Pex Pipe to a Bathroom Sink?
For decades cross-linked polyethylene (PEX) has been used for plumbing jobs such as subfloor radiant heating tubing and water pipes. What makes it perfect for such jobs is its flexibility which allows the pipes to bend around corners and easily fit into cramped spaces, while being affordable. Additionally, PEX tubing easily connects to CPVC and copper pipes. This guide will assist you in How to Install PEX Pipe to bathroom sink.
What is PEX Piping?
Manufactured from cross-linked polyethylene, PEX is a plastic product used for supplying water. Since it’s made from plastic, hence it’s highly flexible and is more easily installed than rigid copper or PVC pipes. However, being flexible, it quickly recoils to its original shape, hence plumbers prefer sticks over coils, as it installs faster and hence plumbers don’t have to make that extra effort to uncoil it each time. Most commonly used sizes are 1/2, 3/4, and 1 inch with diameters 1/4 to 4 inches.
Steps to Install Pex Pipe to Bathroom Sink
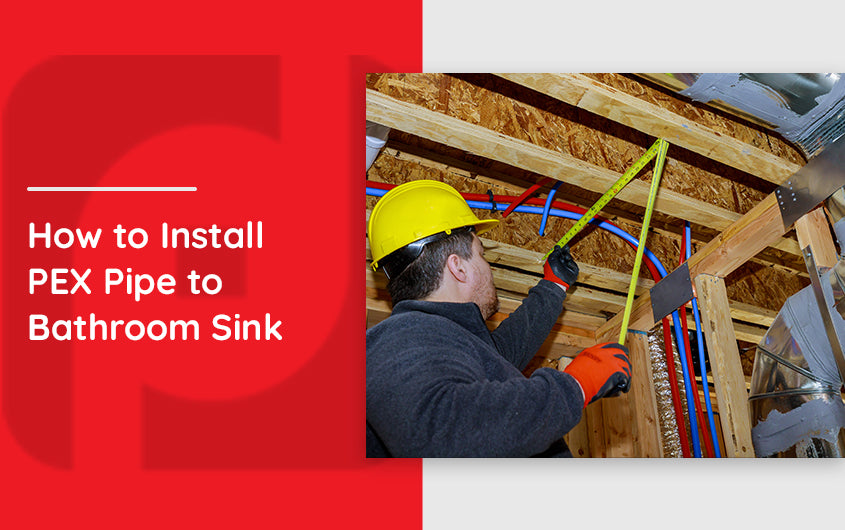
Stage Tools & Materials
A good staging area is highly valuable because all materials and equipment are laid out on it for faster and more efficient working. Arranging it allows you to know that all required tools are on the deck and you can quickly visit the store for any missed-out gear.
- PEX
-
Crimping Tool
-
PEX Pipe Cutter
-
Crimp Rings
-
Tape Measure
-
Adjustable Wrench in different sizes allows you to work easily
Step 1: Turn Off the Water
Water supply pipes must be shut off and drained before commencing the project. Usually, a branch shutoff valve is present in the system which allows the water supply to be shut off from a section of pipe being replaced. Alternatively, you can shut off the main valve to completely close the water supply to the household for repairing the plumbing.
Step 2: Locate the PEX Stub
Usually, it’s positioned beside the floor’s base or under the sink. It can be easily identified by two pieces of PEX pipe sticking out. One line is for the hot water and the other for the cold water line. Mark the pipe with red that connects with the hot water line.
Step 3: Install a Sharkbite Water Line Valve
Place and press hard a Sharkbite water line valve on the stub outs to tightly secure the connection over the pipe. The compression fitting inside the valve permanently holds the pipe securely
Step 4: Turn the valve control knob clockwise until tight
It ensures that water will not run in the supply lines until the installation is complete. Some valves need a quarter-turn, while others require full rotations to shut off.
Step 5: Screw the braided water lines onto the threaded connection at the end of the valves.
Use your hand to turn the nut on the water lines until tight and then use a pair of pliers to secure them tightly in position.
Step 6: Illuminate the space under the sink with a flashlight.
In order to install the pex pipe to the bathroom sink, you'll want to make sure you're able to see what you're doing! Keep your work area well lit to minimize any potential errors or damage.
Step 7: At the sink’s faucet base, pull out the water lines.
Mark the hot water pipeline running from the left side of the sink with red color. On the left control knob screw the nut on the threaded connection of the water line. Fasten by hand and then use a pair of pliers tightly secure the nut.
Step 7: Place the cold water pipeline onto the right control valve.
Screw the nut by hand and use the pliers to tightly secure the nut.
Step 8: Turn both the control knobs clockwise on the Sharkbite valves to open the water flow to the sink.
Step 9: Turn on the main water valve to test the sink’s faucet and allow the flow of water to the entire household.
Check For Leaks in Connections
To check for leaks, turn on the water supply and open the faucet valves. If leaks are, use the adjustable wrench to further tighten the connection. However, if the leak doesn’t get fixed, probably you may want to re-check the connection layout and repair the fault. Being attentive and meticulous will help you avoid possible mistakes. If you need further help, call a seasoned plumber to fix the problem.
Standard Bathroom Sink Heights
Standard bathroom sink heights range from 29 - 36 inches. For instance, pedestal sinks are between 29 and 33 inches high, while vanity cabinets with sinks are available between 30 to 36 inches high.
Is PEX Reliable for Bathroom Sink?
For decades PEX has been used across the globe, with homes supporting 30-year-old, leak-free PEX systems. In the United States due to faulty fitting or sloppy connection, PEX has been looked down upon but is slowly gaining popularity due to its flexibility and high resistance to heat and moisture in the bathroom.
Advantages
Longevity
PEX pipes are resistant to corrosion and rust. You would need to replace them only when they break. Hence great use for the bathroom plumbing system.
Flexibility
PEX can easily move around walls which makes it a great material for retrofitting and plumbing applications.
Easy Installation
PEX being flexible makes easy installation even at joints as no gluing or soldering is required.
Temperature Endurance
Its ability to withstand extreme temperatures, hence can easily transport hot and cold water without melting or freezing.
Disadvantages
Indoor Application
PEX piping manufactured from he plastic can easily get damaged by UV radiation. Hence, it can be used only indoors.
Conclusion
We hope this guide on How to Install PEX Pipe to Bathroom Sink will help you complete the job successfully. Using this reliable pipe for plumbing needs in your bathroom is a wise decision.


